# Shapefiles
**Overview**
Shapefiles are a common format for storing vector data. Vector data is used to represent objects such as points, lines and polygons by a set of geographical coordinates. Vector data usually includes attribute values for each object - for example a road number, a village name or the population of province.
It is a collection of at least three basic files: .shp, .shx and .dbf. All three files must be present in the same directory for them to be viewable. There may be additional files such as a .prj with the shapefile’s projection information. Commonly, shapefiles are compressed in a .zip file for transfer such as emailing as an attachment or via a web site download.
### **Pronghorn Data**
First we'll add some Pronghorn GPS point data from [movebank](https://www.movebank.org/cms/webapp?gwt_fragment=page=studies,path=study2478177417). Movebank is a large and comprehensive portal focused on animal tracking, covering all species and continents. It includes citations for papers and the data that accompanies them, and online tools for visualization. The repository contains lots of geospatial data that tracks the location and movement of wildlife, generated by different means such as visual observation (from the ground, boats, or aircraft) or tagging and monitoring with radio or satellite telemetry. Some goals of Movebank also includes:
* Archive animal movement data for future use.
* Help scientists address questions by combining data sets from separate studies to test ecological or evolutionary ideas.
* Allow the public to explore the amazing animal movements recorded by animal trackers.
* Promote open access to animal movement data. Most study data are not published.
1. Download GPS pronghorn data as a shapefile from Movebank.
2. Add the zipped data into your new `Data` folder
3. In the tool bar navigate to `Layer` > `Add Layer` > `Vector layer`
4. Select Source Type `File` > navigate to the Data folder and select `points.shp`
Your map canvas should now look like this:
Before we can create any heatmaps, we need to re-project the source data to a projected CRS. As distance plays an important role in the computation of heatmaps, MCP and the queries we will run, it is not correct to use a geographic CRS. The data must be in a projected coordinate system (PCS) that has a linear unit of measurement because these tool calculate the number of features per unit area.
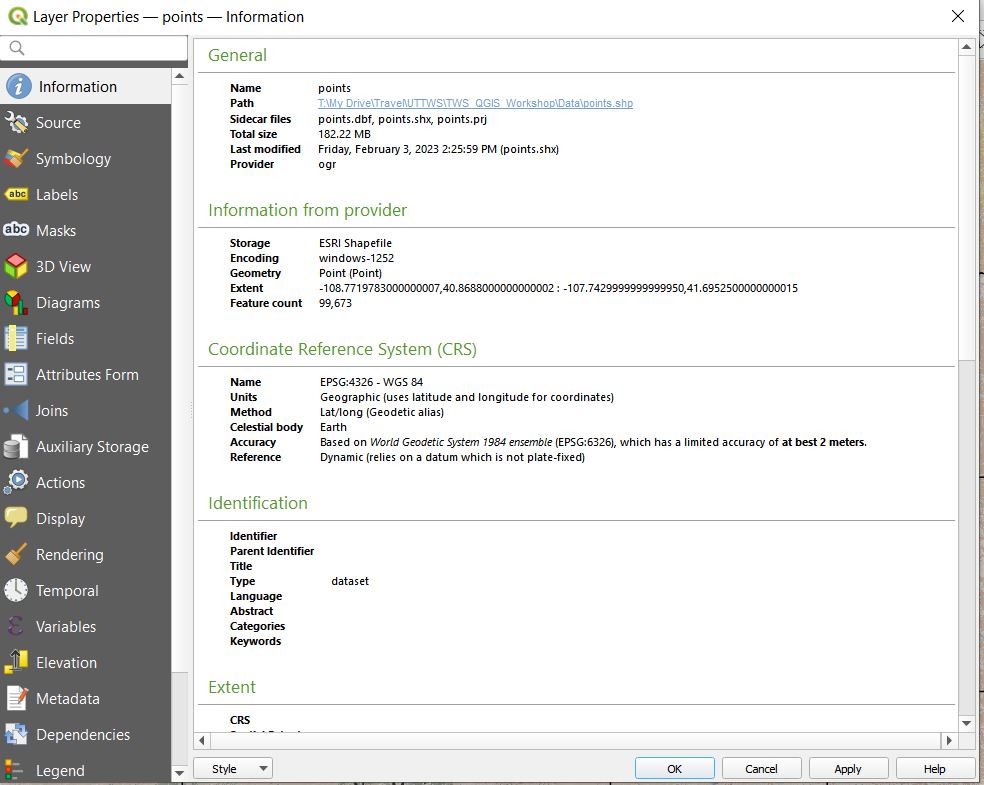
First, let's check to see what CRS our data is in.
1. Double click on the point layer added > Source. Scroll down and you'll see the data is in WGS 84. The data is in a geographic coordinate system and to use tools to calculate distance, and kernel density estimates the data must be in a projected coordinate system that has a linear unit of measurement. This is because these tools calculate the number of features per unit area.
2. Search and find the Vector general ‣ Reproject layer algorithm.
3. Navigate to the toolbox and search *reproject*
4. Use the points layer as the input.
5. Select the world icon next to `Target CRS.` Use the search bar to look for Zone 12N and select NAD83/UTM zone 12 N.
Every state in the US has one or more [state plane zones](https://geodesy.noaa.gov/SPCS/images/spcs83_conus_final.png) that you can select for making optimal maps for that area, in feet or meters. Throughout the world, you could choose an appropriate [UTM zone](https://en.wikipedia.org/wiki/Universal_Transverse_Mercator_coordinate_system) that covers your area in meters. For countries or continents, look for an equidistant projection (meters again). You'll notice there are two options WGS 84 and NAD83.
WGS 84 / UTM zone 12N is based on the World Geodetic System of 1984 (WGS84) and is a commonly used PCS for GPS and mapping applications worldwide, and is suitable for global navigation and satellite imagery analysis. NAD83 / UTM zone 12N, is based on the North American Datum of 1983 (NAD83) and is commonly used in North America for accurate mapping and surveying applications.
The main difference between the two coordinate systems is the datum they are based on. NAD83 is a North American datum that was developed for accurate mapping of North America, while WGS 84 is a global datum that was developed for satellite navigation and global positioning.
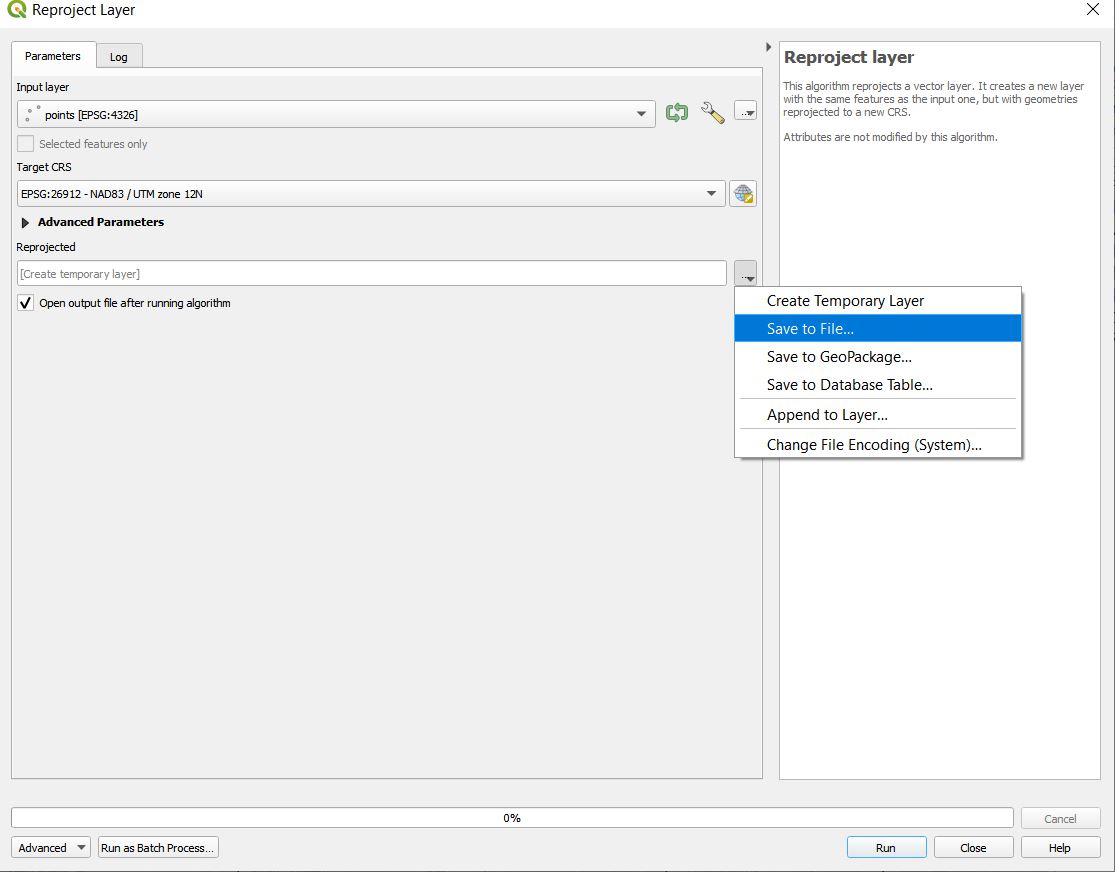
4. Navigate back to the Parameters.
5. If we clicked `Run` this would save the new reprojected layer as a scratch layer. Without changing the path, it's going to save it as a **memory layer** (or 'scratch' layer). As it's in memory, it's not written off to disk and will vanish once you close QGIS. Incase our QGIS crashes let's save it as a shapefile file by selecting the three dots next to path. Save it in your `Data` folder as a shapefile.