> For the complete documentation index, see [llms.txt](https://uttws.gitbook.io/gis-workshop/llms.txt). Markdown versions of documentation pages are available by appending `.md` to page URLs; this page is available as [Markdown](https://uttws.gitbook.io/gis-workshop/exercise/adding-data/create-new-data.md).

# Create New Data

If you want to create points, lines, and polygons, then you can make a new [shapefile](https://gisgeography.com/arcgis-shapefile-files-types-extensions/) to store these features:

1. In your browser panel, navigate to your `data` folder for this project.&#x20;

<figure><img src="https://2205741137-files.gitbook.io/~/files/v0/b/gitbook-x-prod.appspot.com/o/spaces%2F9cMAMCb5DcFjpDJPHG1T%2Fuploads%2FU3Vnb2k4cgXZyfW7s9Nl%2Fbrowser.JPG?alt=media&amp;token=7017d178-4ca8-4c1a-a8c3-eb058e5bc02b" alt=""><figcaption></figcaption></figure>

2. Right-click on the data, select `New ▸ Shapefile`
3. Change the file name to "project\_area"
4. Choose the feature geometry as polygons
5. Select the encoding type and [coordinate reference system](https://gisgeography.com/latitude-longitude-coordinates/).

<figure><img src="https://2205741137-files.gitbook.io/~/files/v0/b/gitbook-x-prod.appspot.com/o/spaces%2F9cMAMCb5DcFjpDJPHG1T%2Fuploads%2Ft5S5eBSq3W5U3ipG90wJ%2Fprojectaraa.JPG?alt=media&amp;token=c7bdb2e5-a090-4e02-b194-e0d6812d3d68" alt=""><figcaption></figcaption></figure>

5. Click `OK`
6. Drag and drop the new layer into your layer list

<figure><img src="https://2205741137-files.gitbook.io/~/files/v0/b/gitbook-x-prod.appspot.com/o/spaces%2F9cMAMCb5DcFjpDJPHG1T%2Fuploads%2F32nFL7uMA5wgjz2RjQJU%2Ftoggleediting.JPG?alt=media&amp;token=a1a3be09-7334-4d73-80d6-f9704a1f333c" alt=""><figcaption></figcaption></figure>

### Add data to empty shapefile

&#x20; 1\. Select, and highlight the `project_area` layer in the layer panel.&#x20;

2. Right click the layer and select `Toggle Editing`. From here, it enables the editing tools.

<figure><img src="https://2205741137-files.gitbook.io/~/files/v0/b/gitbook-x-prod.appspot.com/o/spaces%2F9cMAMCb5DcFjpDJPHG1T%2Fuploads%2F32nFL7uMA5wgjz2RjQJU%2Ftoggleediting.JPG?alt=media&amp;token=a1a3be09-7334-4d73-80d6-f9704a1f333c" alt=""><figcaption></figcaption></figure>

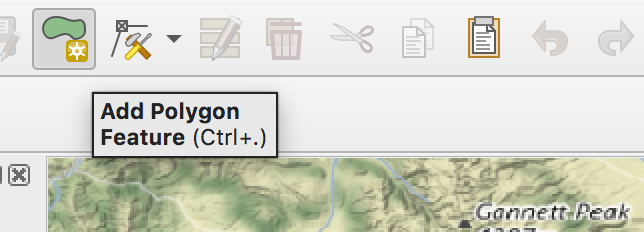
3\. Select add polygon feature. Click on the map canvas and add vertices. Draw a polygon around the GPS points added.

<figure><img src="https://2205741137-files.gitbook.io/~/files/v0/b/gitbook-x-prod.appspot.com/o/spaces%2F9cMAMCb5DcFjpDJPHG1T%2Fuploads%2FxF8OQDzmO5Eizm9JKMAK%2FScreen%20Shot%202023-01-29%20at%206.05.09%20PM.png?alt=media&amp;token=59a9201a-d458-44bb-be8b-38c88304c52d" alt=""><figcaption></figcaption></figure>

4\. To finish geometry,  right-click on the map canvas. From here, you can fill in the attributes. If you want to save your edits, click the “Save Layer” button.

5. Right click on the project\_area layer and toggle off editing mode and save.

<figure><img src="https://2205741137-files.gitbook.io/~/files/v0/b/gitbook-x-prod.appspot.com/o/spaces%2F9cMAMCb5DcFjpDJPHG1T%2Fuploads%2Fp61JIcLwpWIZR9PfQ7Uz%2Fdrawpolygon.JPG?alt=media&amp;token=ca640893-ae7b-45a7-8c3a-c324d1fd04ff" alt=""><figcaption></figcaption></figure>